Reveal: Upper Suites Bathroom
When looking back at this project, I realize that this project started 7 months ago! I can’t believe how much time has passed! Obviously, there were several hiccups along the way, and working on the project in a part-time manner made the timeline expand longer than we anticipated, but it’s finally finished and just in time, too, because the anniversary of when I purchased the building is quickly coming to year 2 year and I love to wrap up our projects in coordination with an anniversary.
So, I’m very excited to share how this beautiful bathroom turned out–it was worth every hiccup!
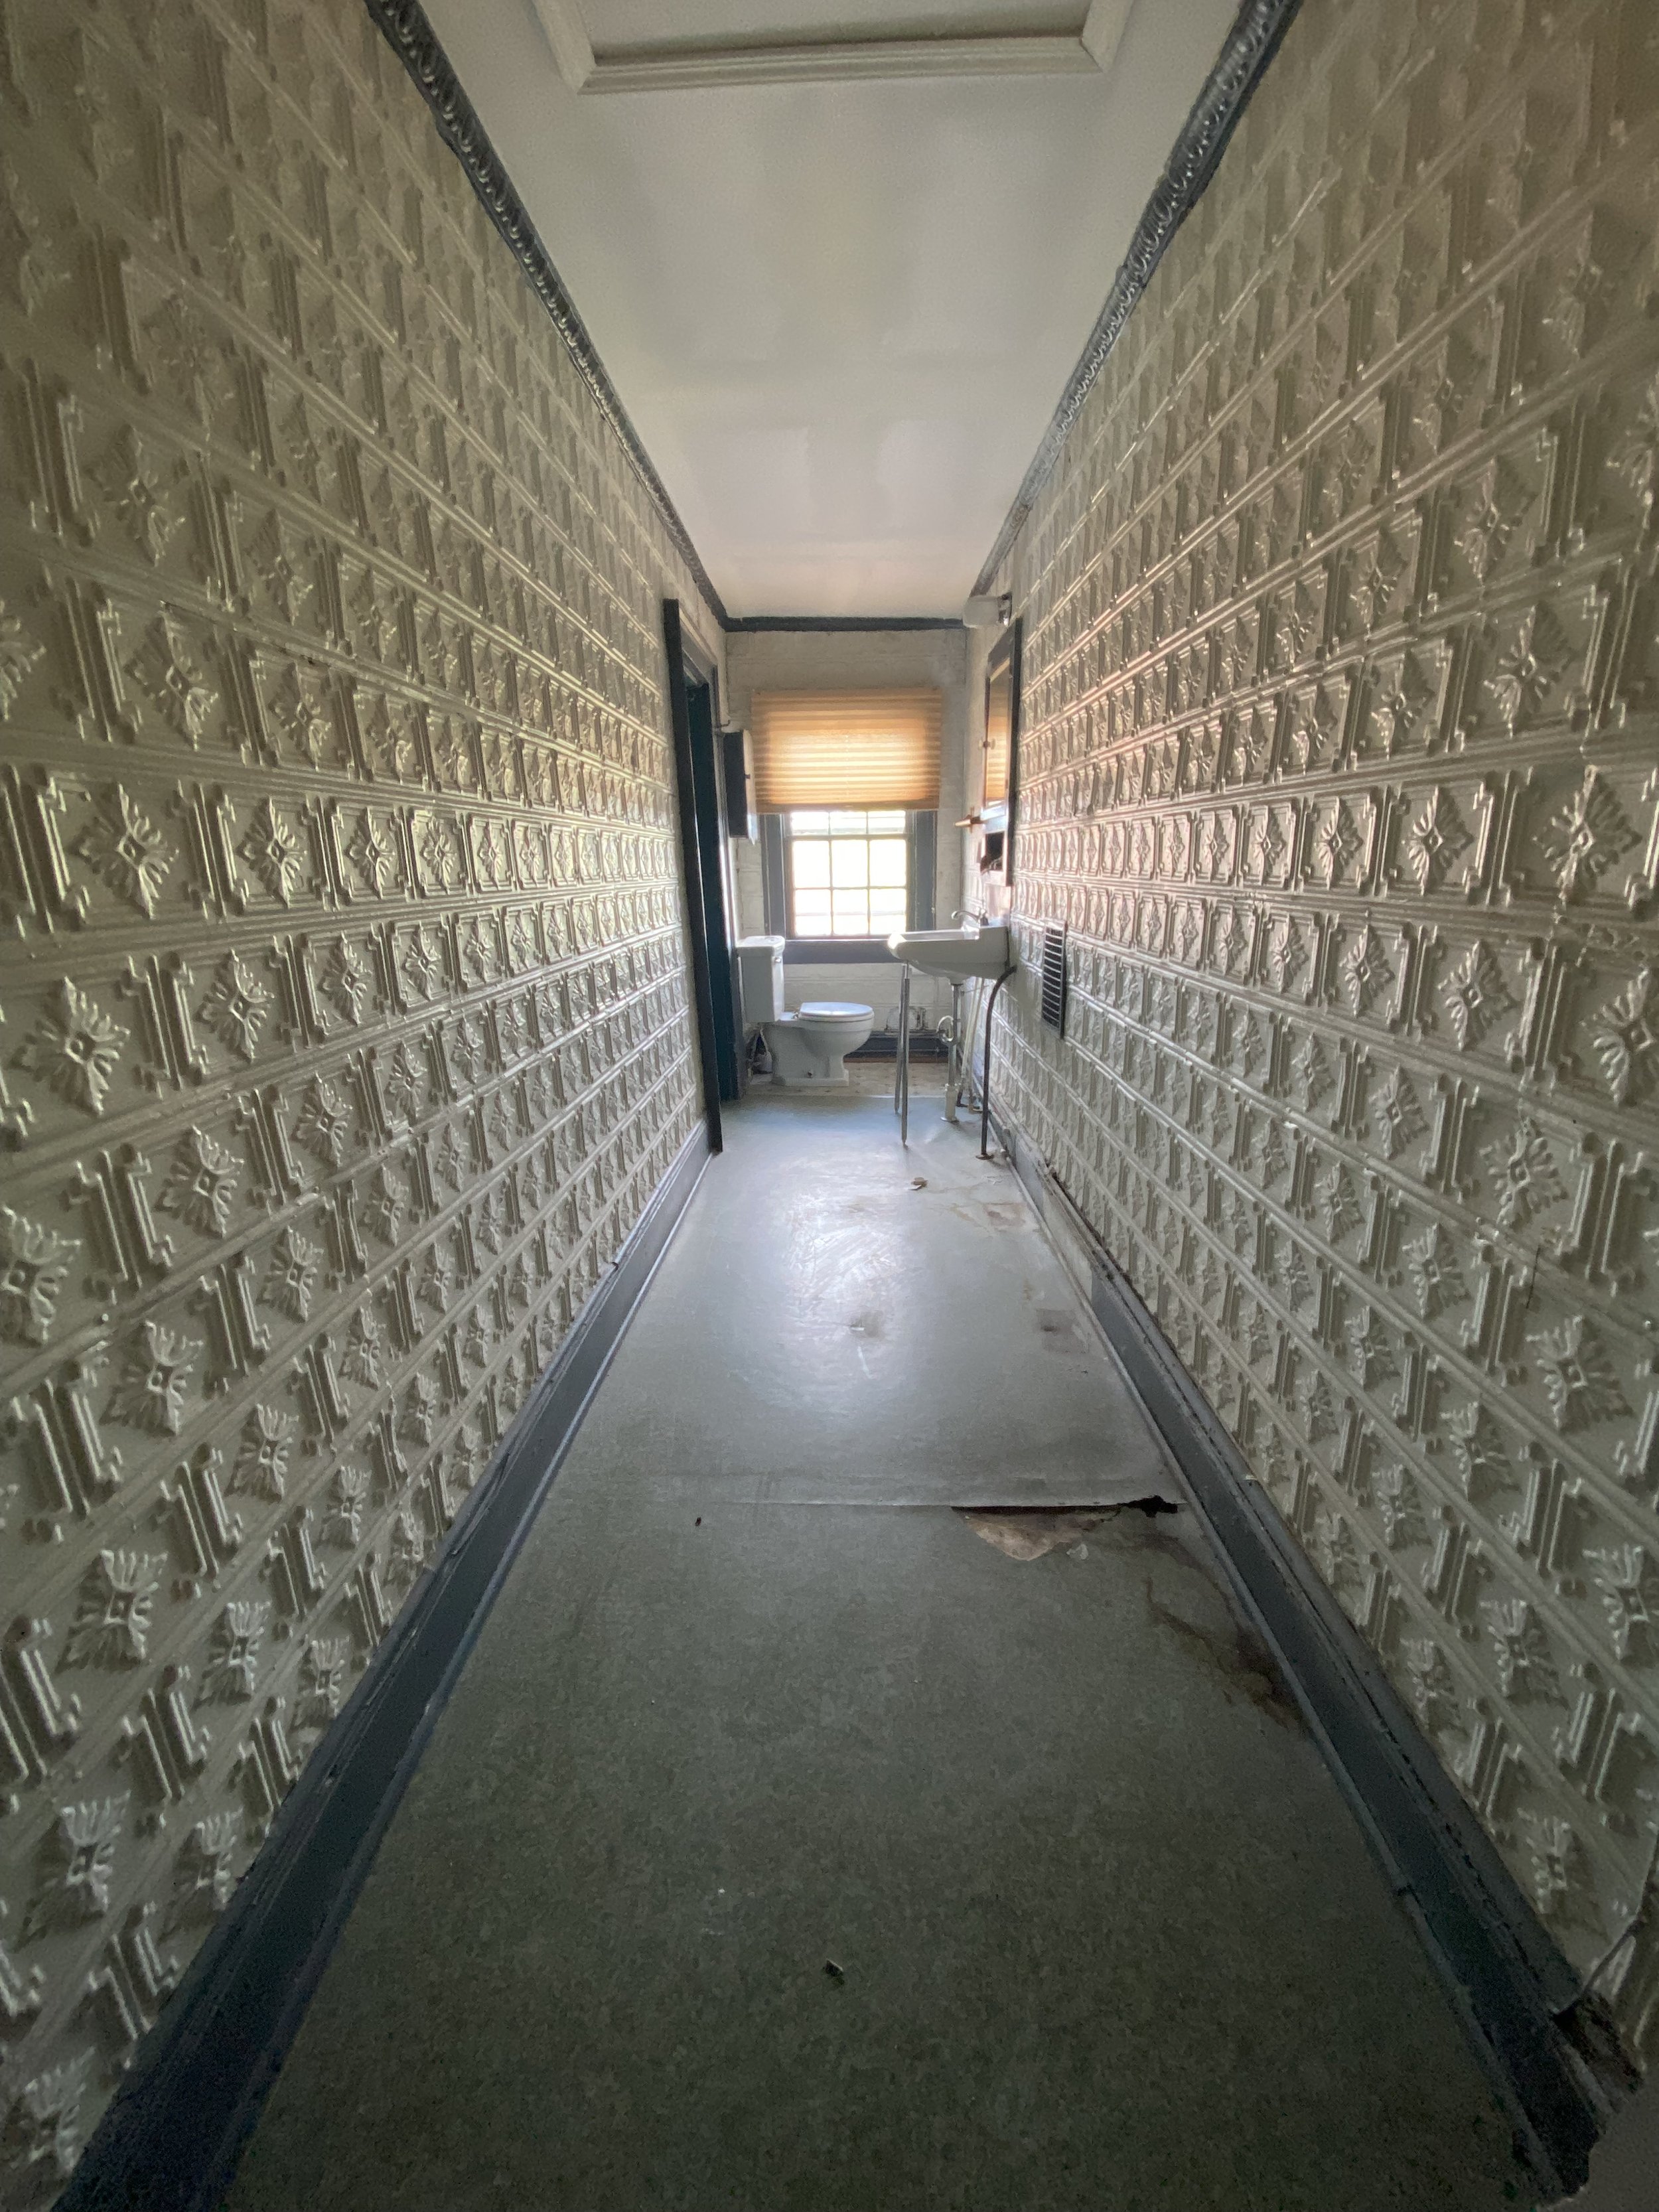
The decision for this upstairs bathroom renovation actually stemmed from our frustrations with its functionality. The space was a long narrow jack-and-jill style bathroom with one entrance in an office space and the other entrance by the stairwell door. And since this bathroom was available for all tenants in the upper suites and their guests if one person forgot to unlock both doors, it was a frustrating and sometimes disruptive process to get into the bathroom.
The bathroom took up a lot of space, but so inefficiently. Here’s what the bathroom looked like before!
Before
POV: You’re standing in the doorway entrance located by the main stairwell.
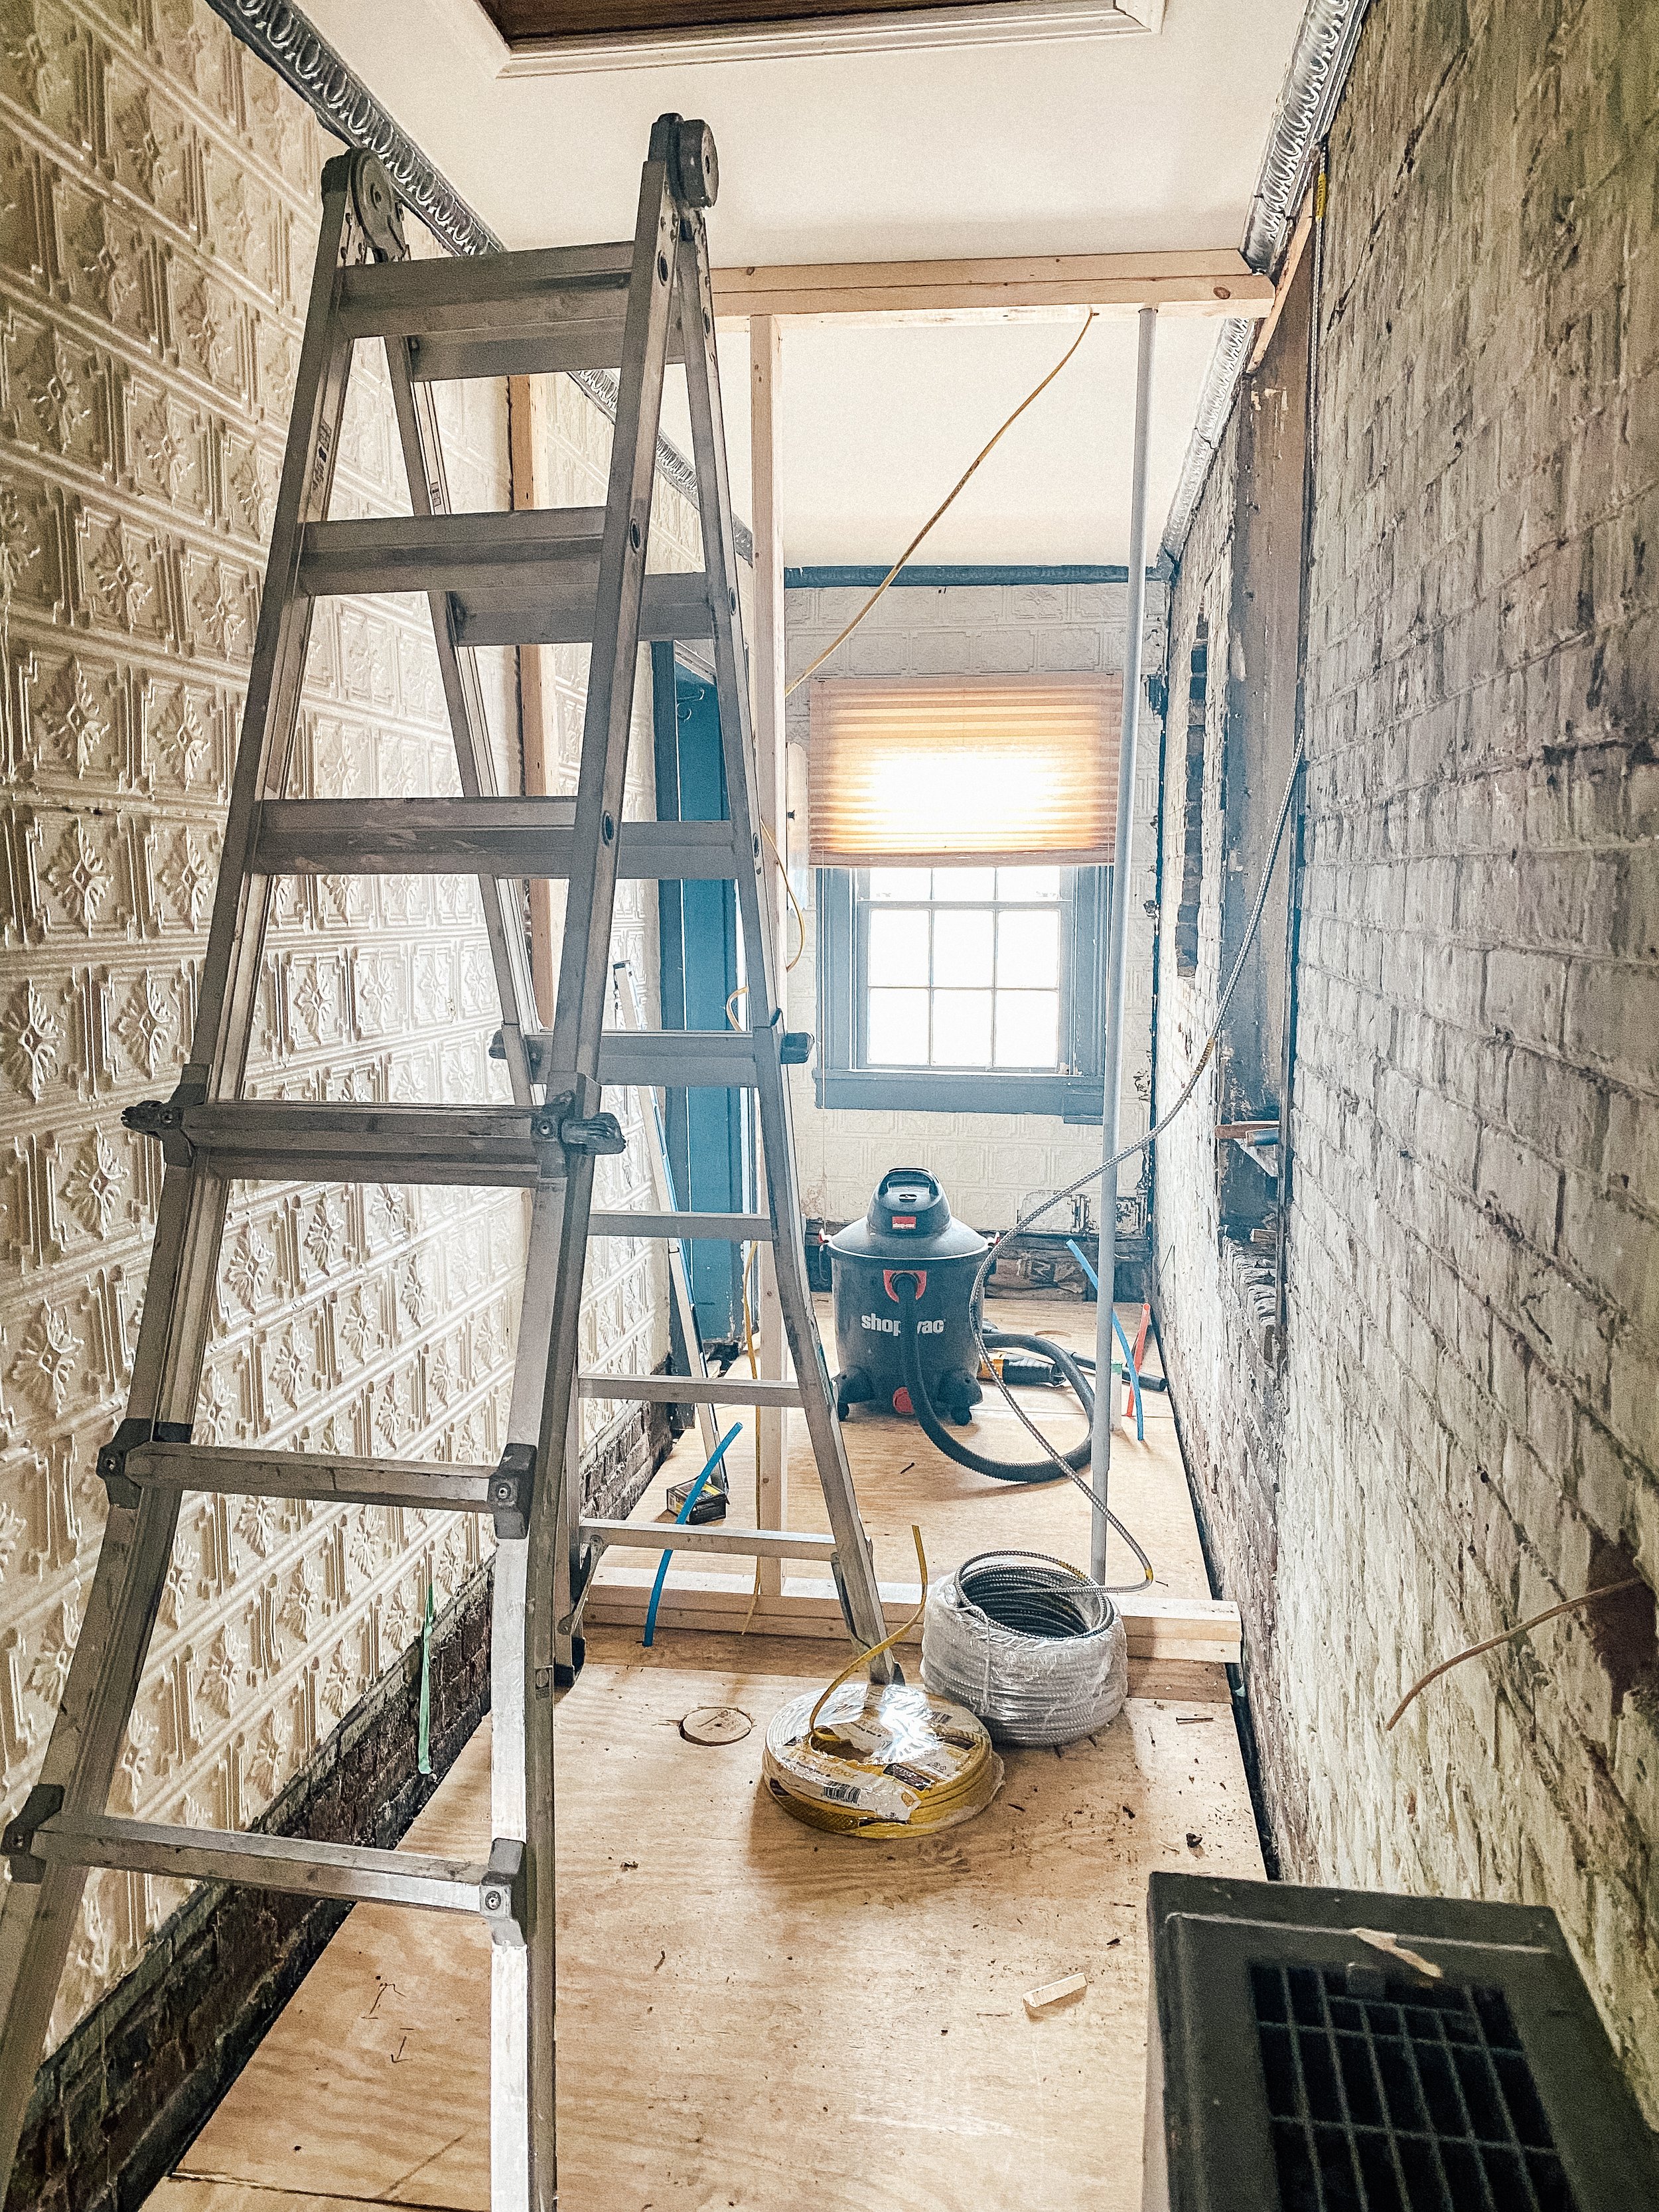
Be sure to take a closer look at the layout before and after to get a better visual of how everything got switched, but I’ll try my best to explain it. I decided to divide the long narrow bathroom into 2 separate water closets—one functioning as a bathroom for the upper suites and their guests and the other as a private bathroom for Suite 301. Since a full bathroom wasn’t needed for a commercial building, we opted to remove the original clawfoot tub (but saved in storage) to make this space make more sense in its current capacity.
Progress
After: Upper Suites Bathroom
This is the upper suites and their guest’s bathroom! It’s by the main stairwell and slightly in Suite 200. I wanted to ensure the space was modern in functionality, but still felt time part of the historic charm that the rest of the building has.
Let’s take a closer look at everything, shall we?
The Bathroom Breakdown
Not only was the budget for this project tight but there were limitations due to the historic nature of the building. So tough decisions were needed when planning it out.
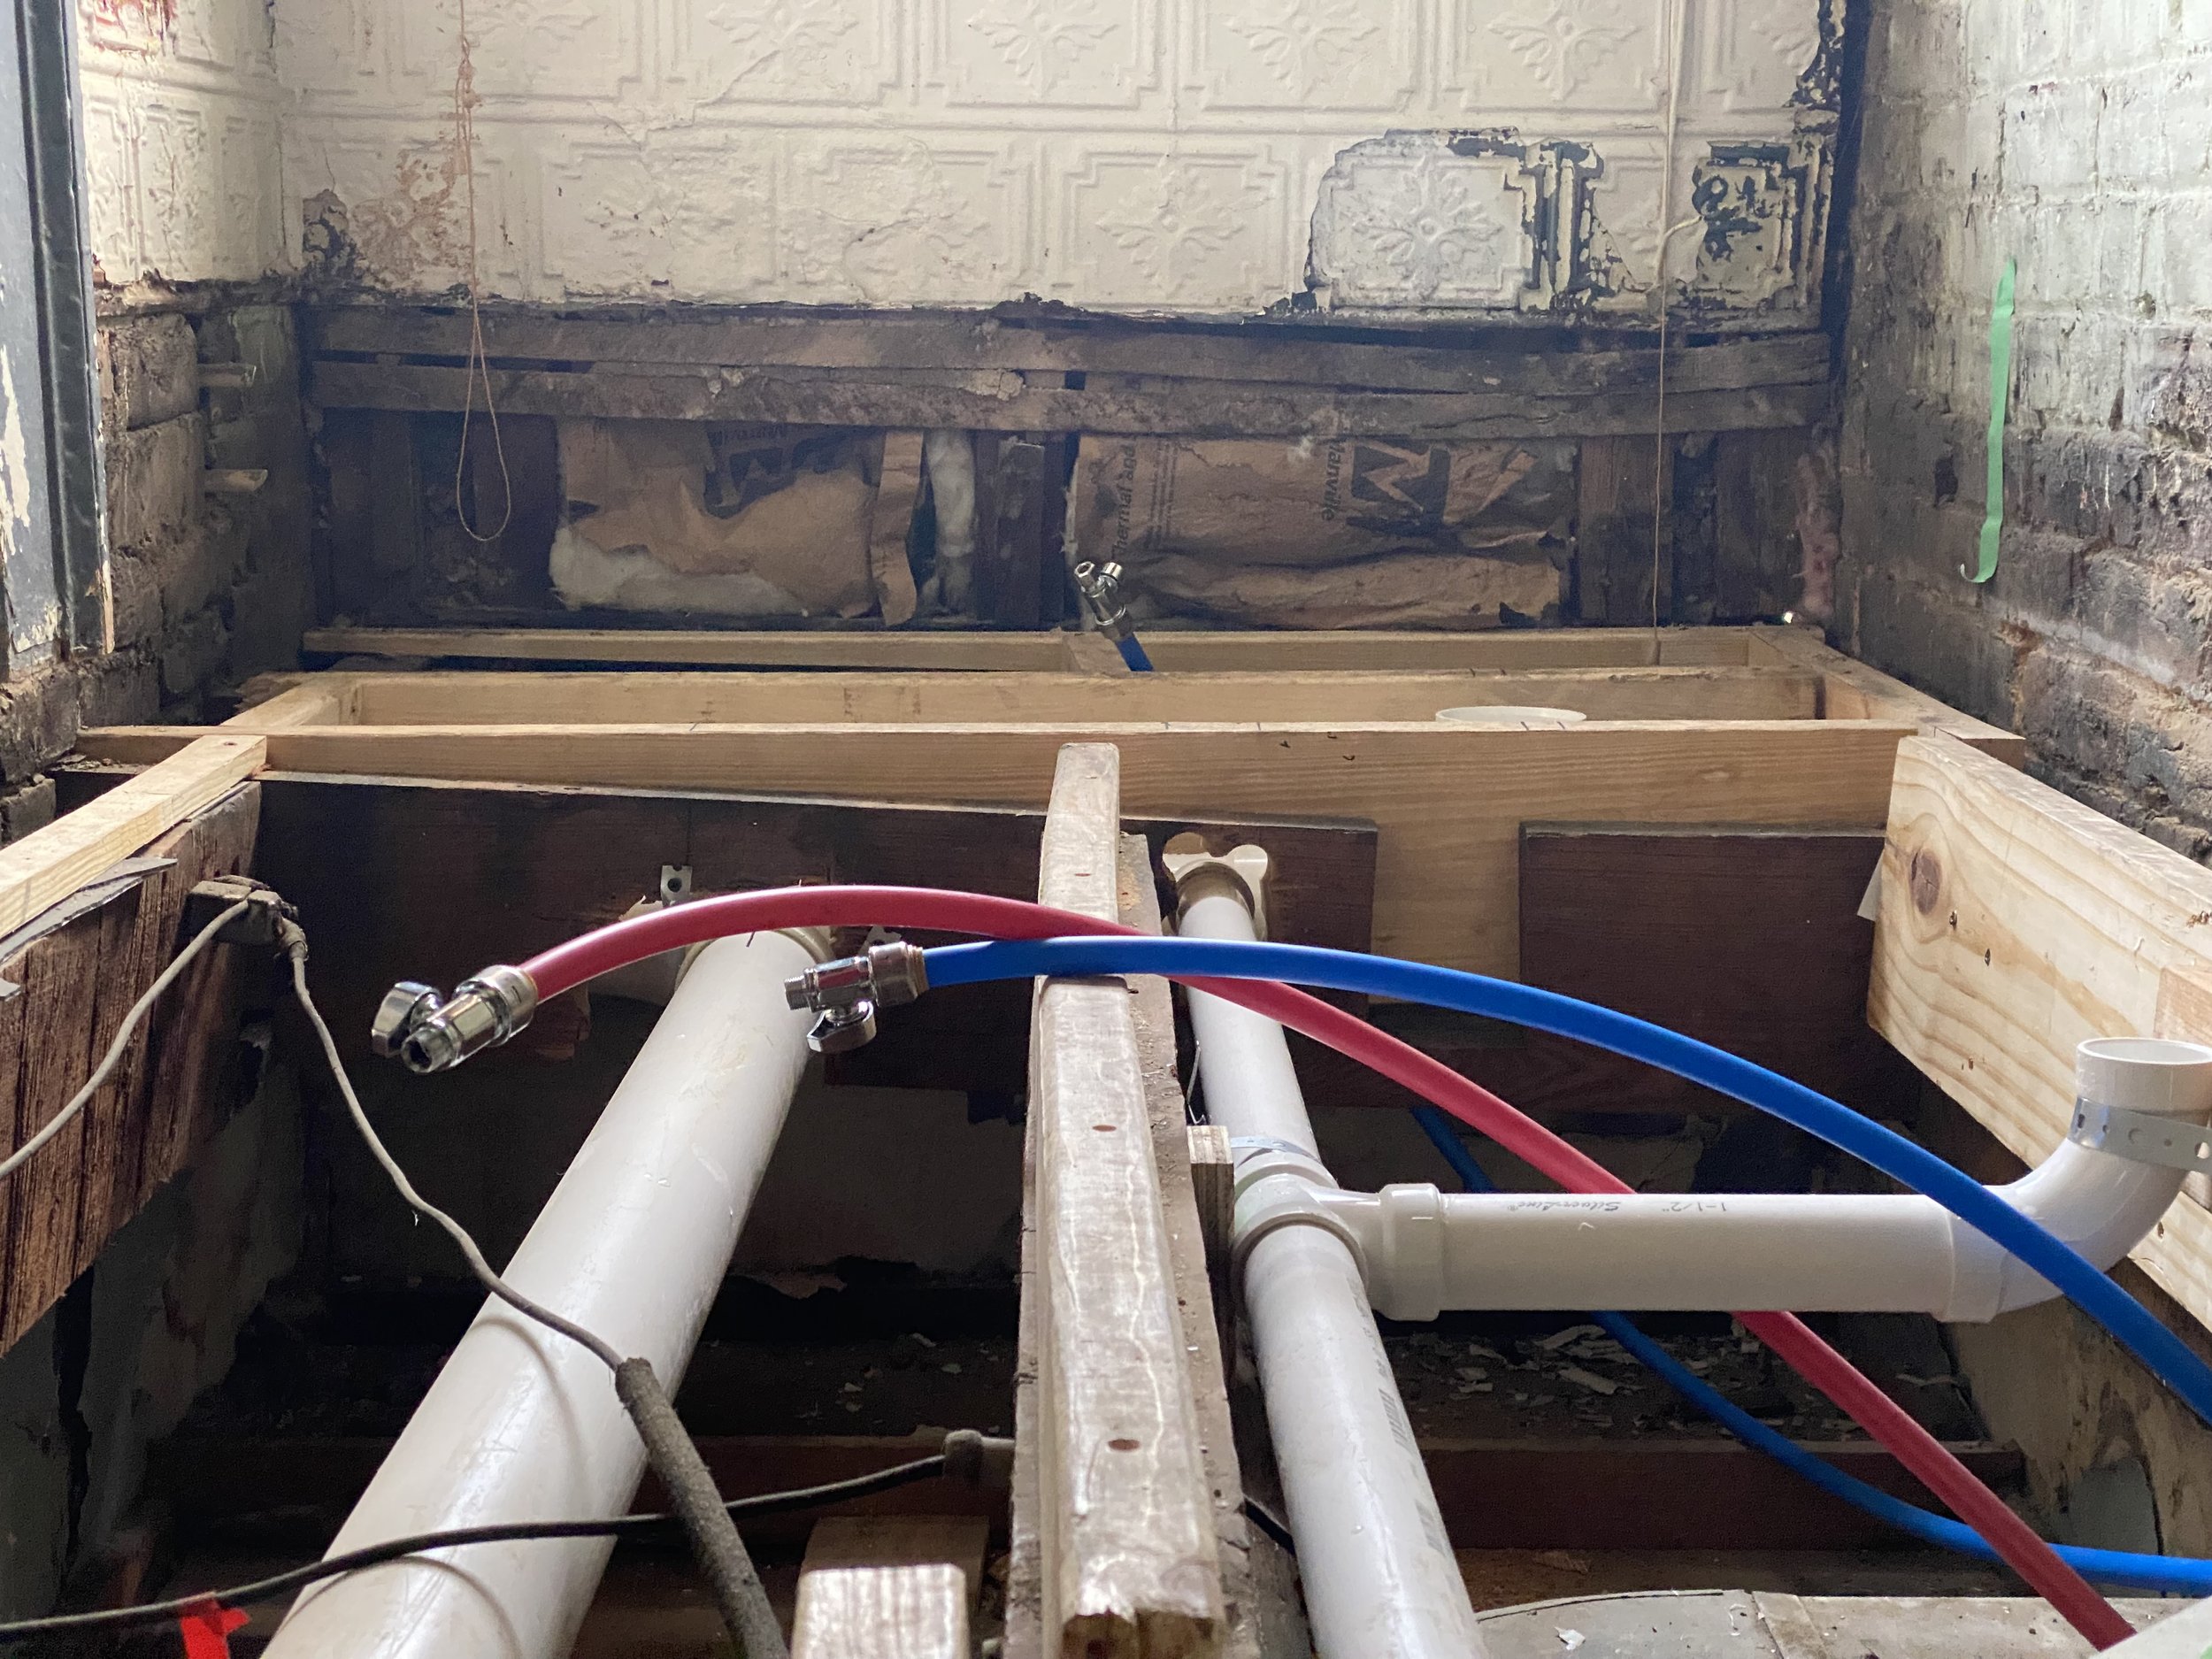
First things first—the plumbing and electrical had to be addressed. Since this bathroom had a long history of plumbing issues, now was the time to address them. We took out all of the old pipes, updated the electrical, and added in new outlets since the whole space only had 1 original outlet.
Before the renovation, I also knew that the floor wasn’t level in this room, but once we started the demo, I discovered just how massive the downward tilt was. Take a look at this photo. The lighter wood is the new 2x4s used as a base for the new level floor, whereas the darker wood is the original beams. YIKES!
Hardwood Floors
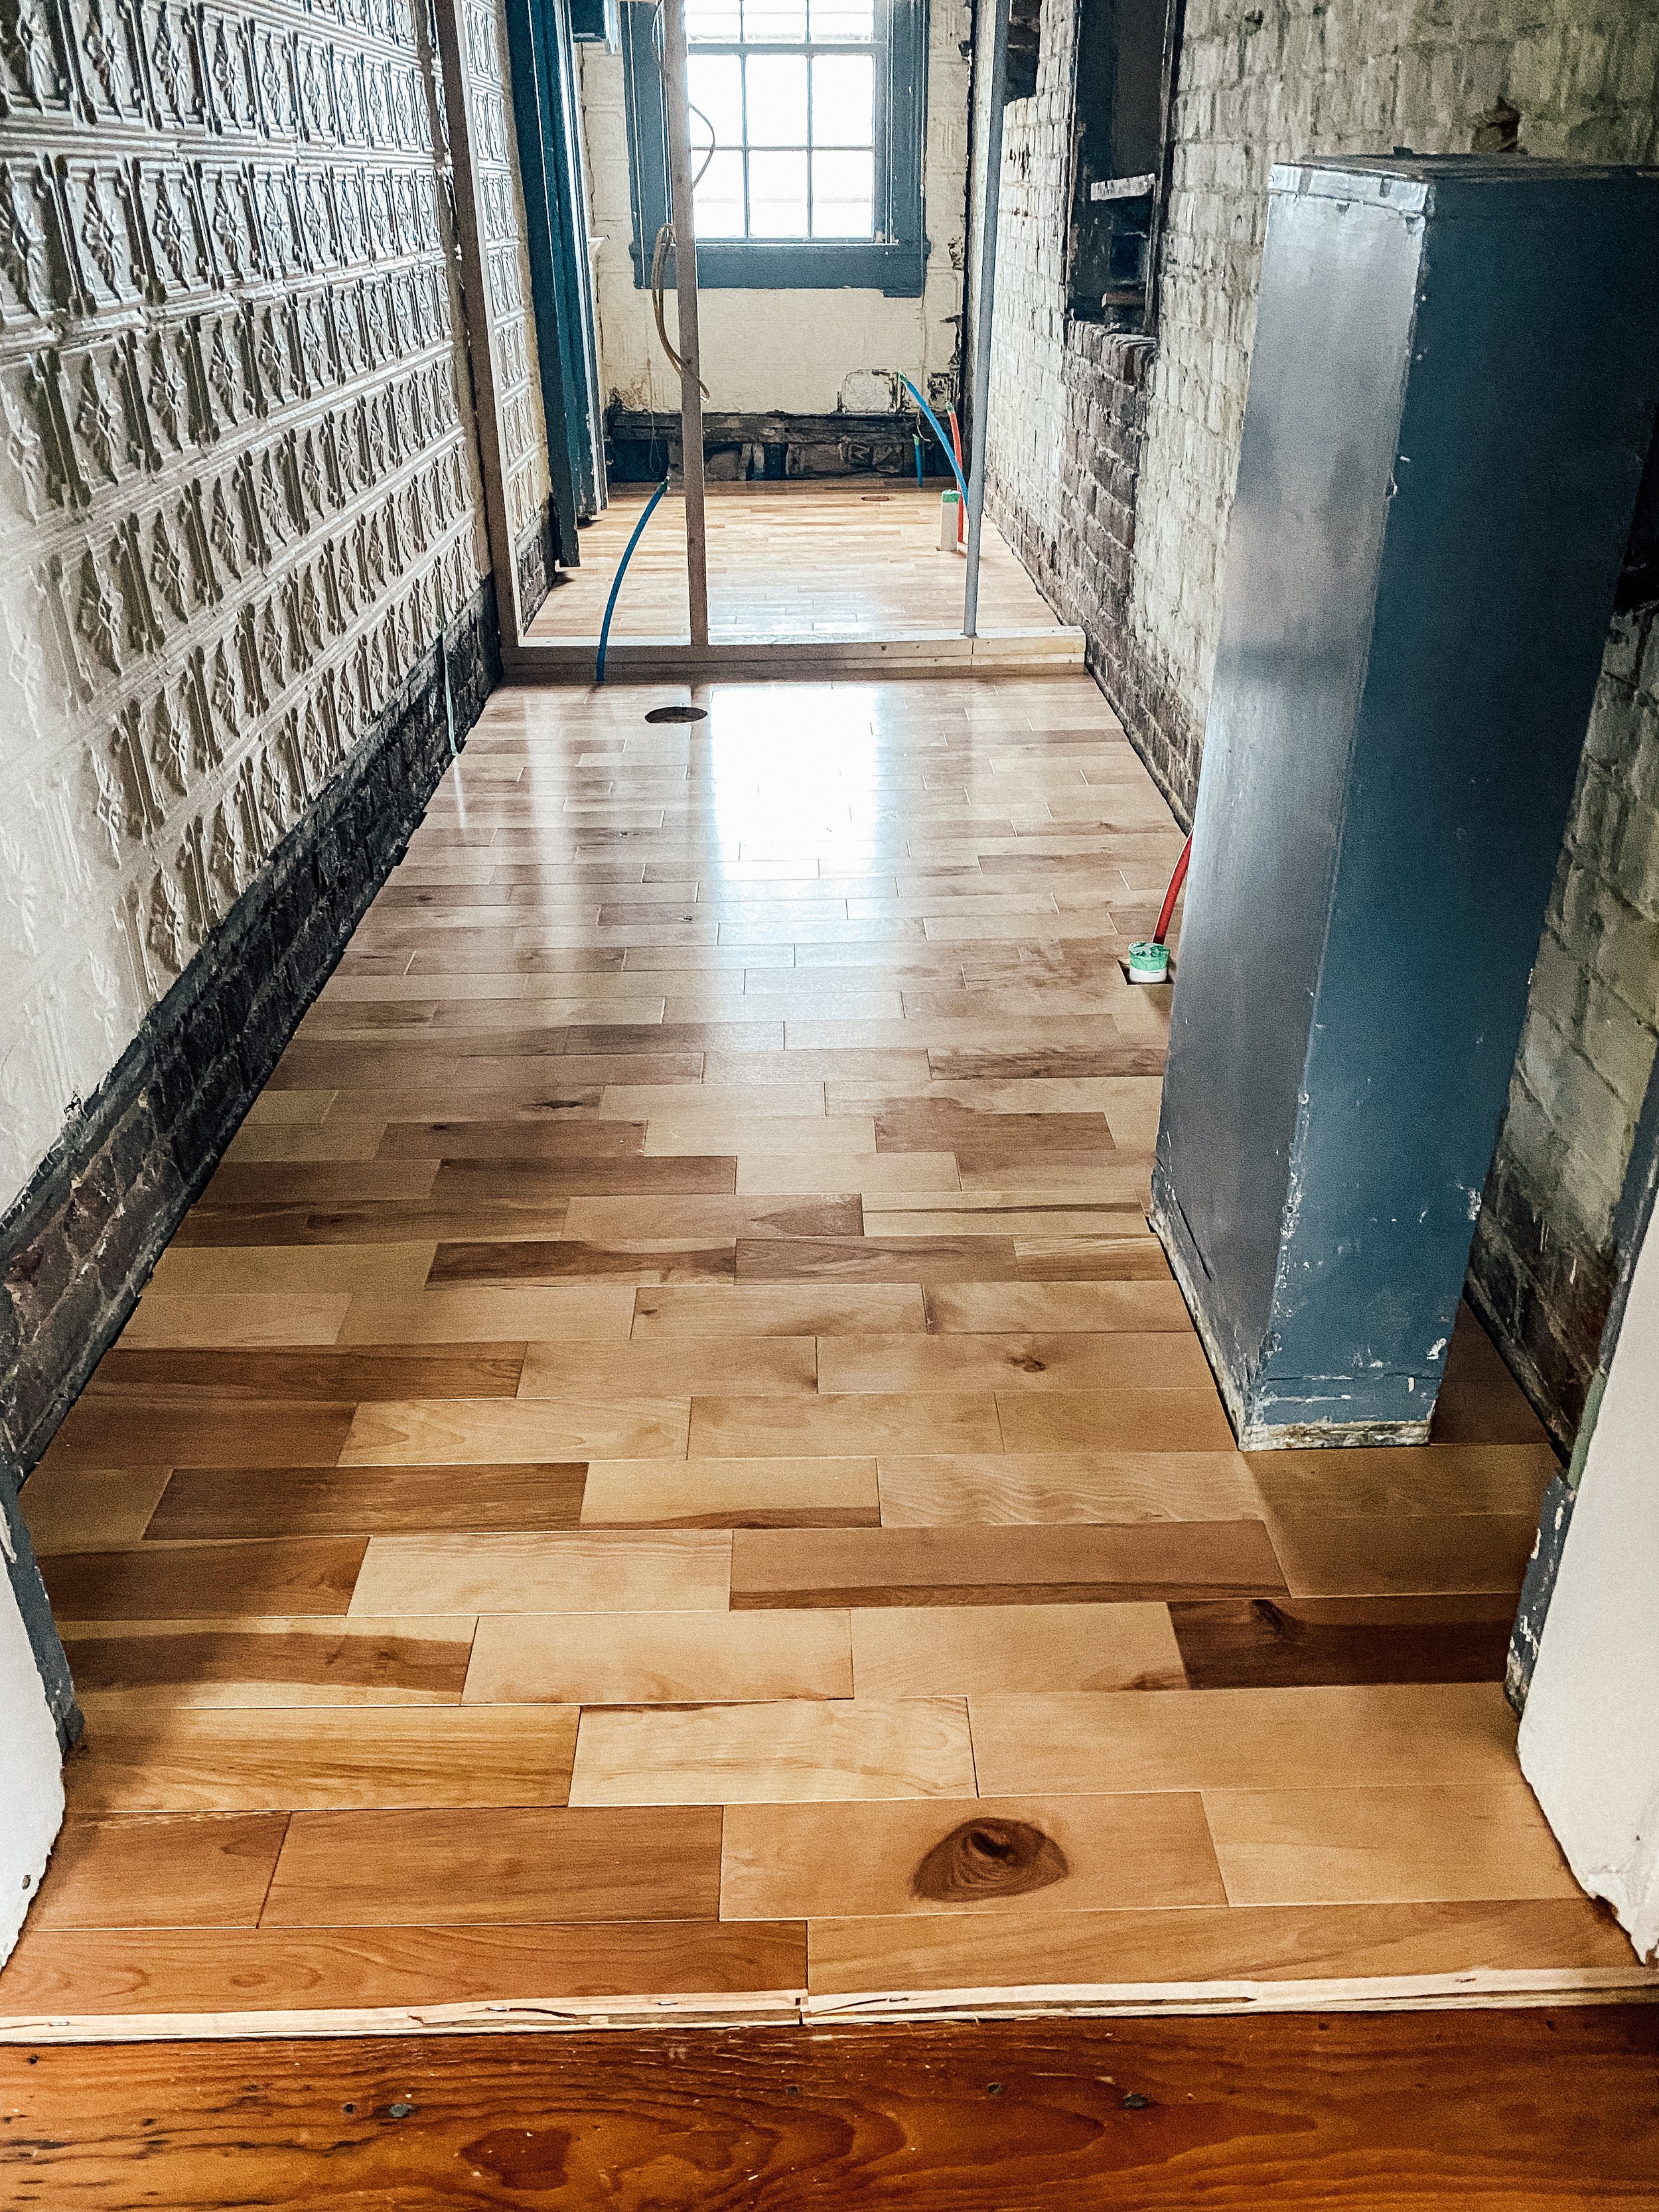
I know this is going to be a controversial topic, but for these bathrooms, I opted for hardwood floors. My little heart was craving penny tile, but this is where hard decisions due to the historical limitations came in. I simply did not have enough space to add baseboard and cementboard and have it even remotely line up with the other rooms. It would have forced an unnatural and awkward transitional step for both spaces.
Often hardwood is a very expensive option, but when you’re thrifty and have an open mind, it’s a possibility—which is exactly the approach I took. I visited a local flooring store to see what they had in stock in their warehouse and we found some beautiful pecan backstock they were just trying to offload. Score!
Just a few days later, the floors were installed and I could not be any happier with my decision.
Brick Wall Exposure
The bathroom had the home’s original ceiling tile (made by John Casey….more on that later) on all four walls, but in a few spots, it was aging and cracking. I decided to see what was behind them to see if we had an alternative wall option. So with my pinkies and toes crossed, we uncovered the original brick!
Since one wall was still in great shape, we kept this historic element in the space and removed the pieces from the other walls, and tucked them away in storage. I can’t bear to get rid of historical pieces like this.
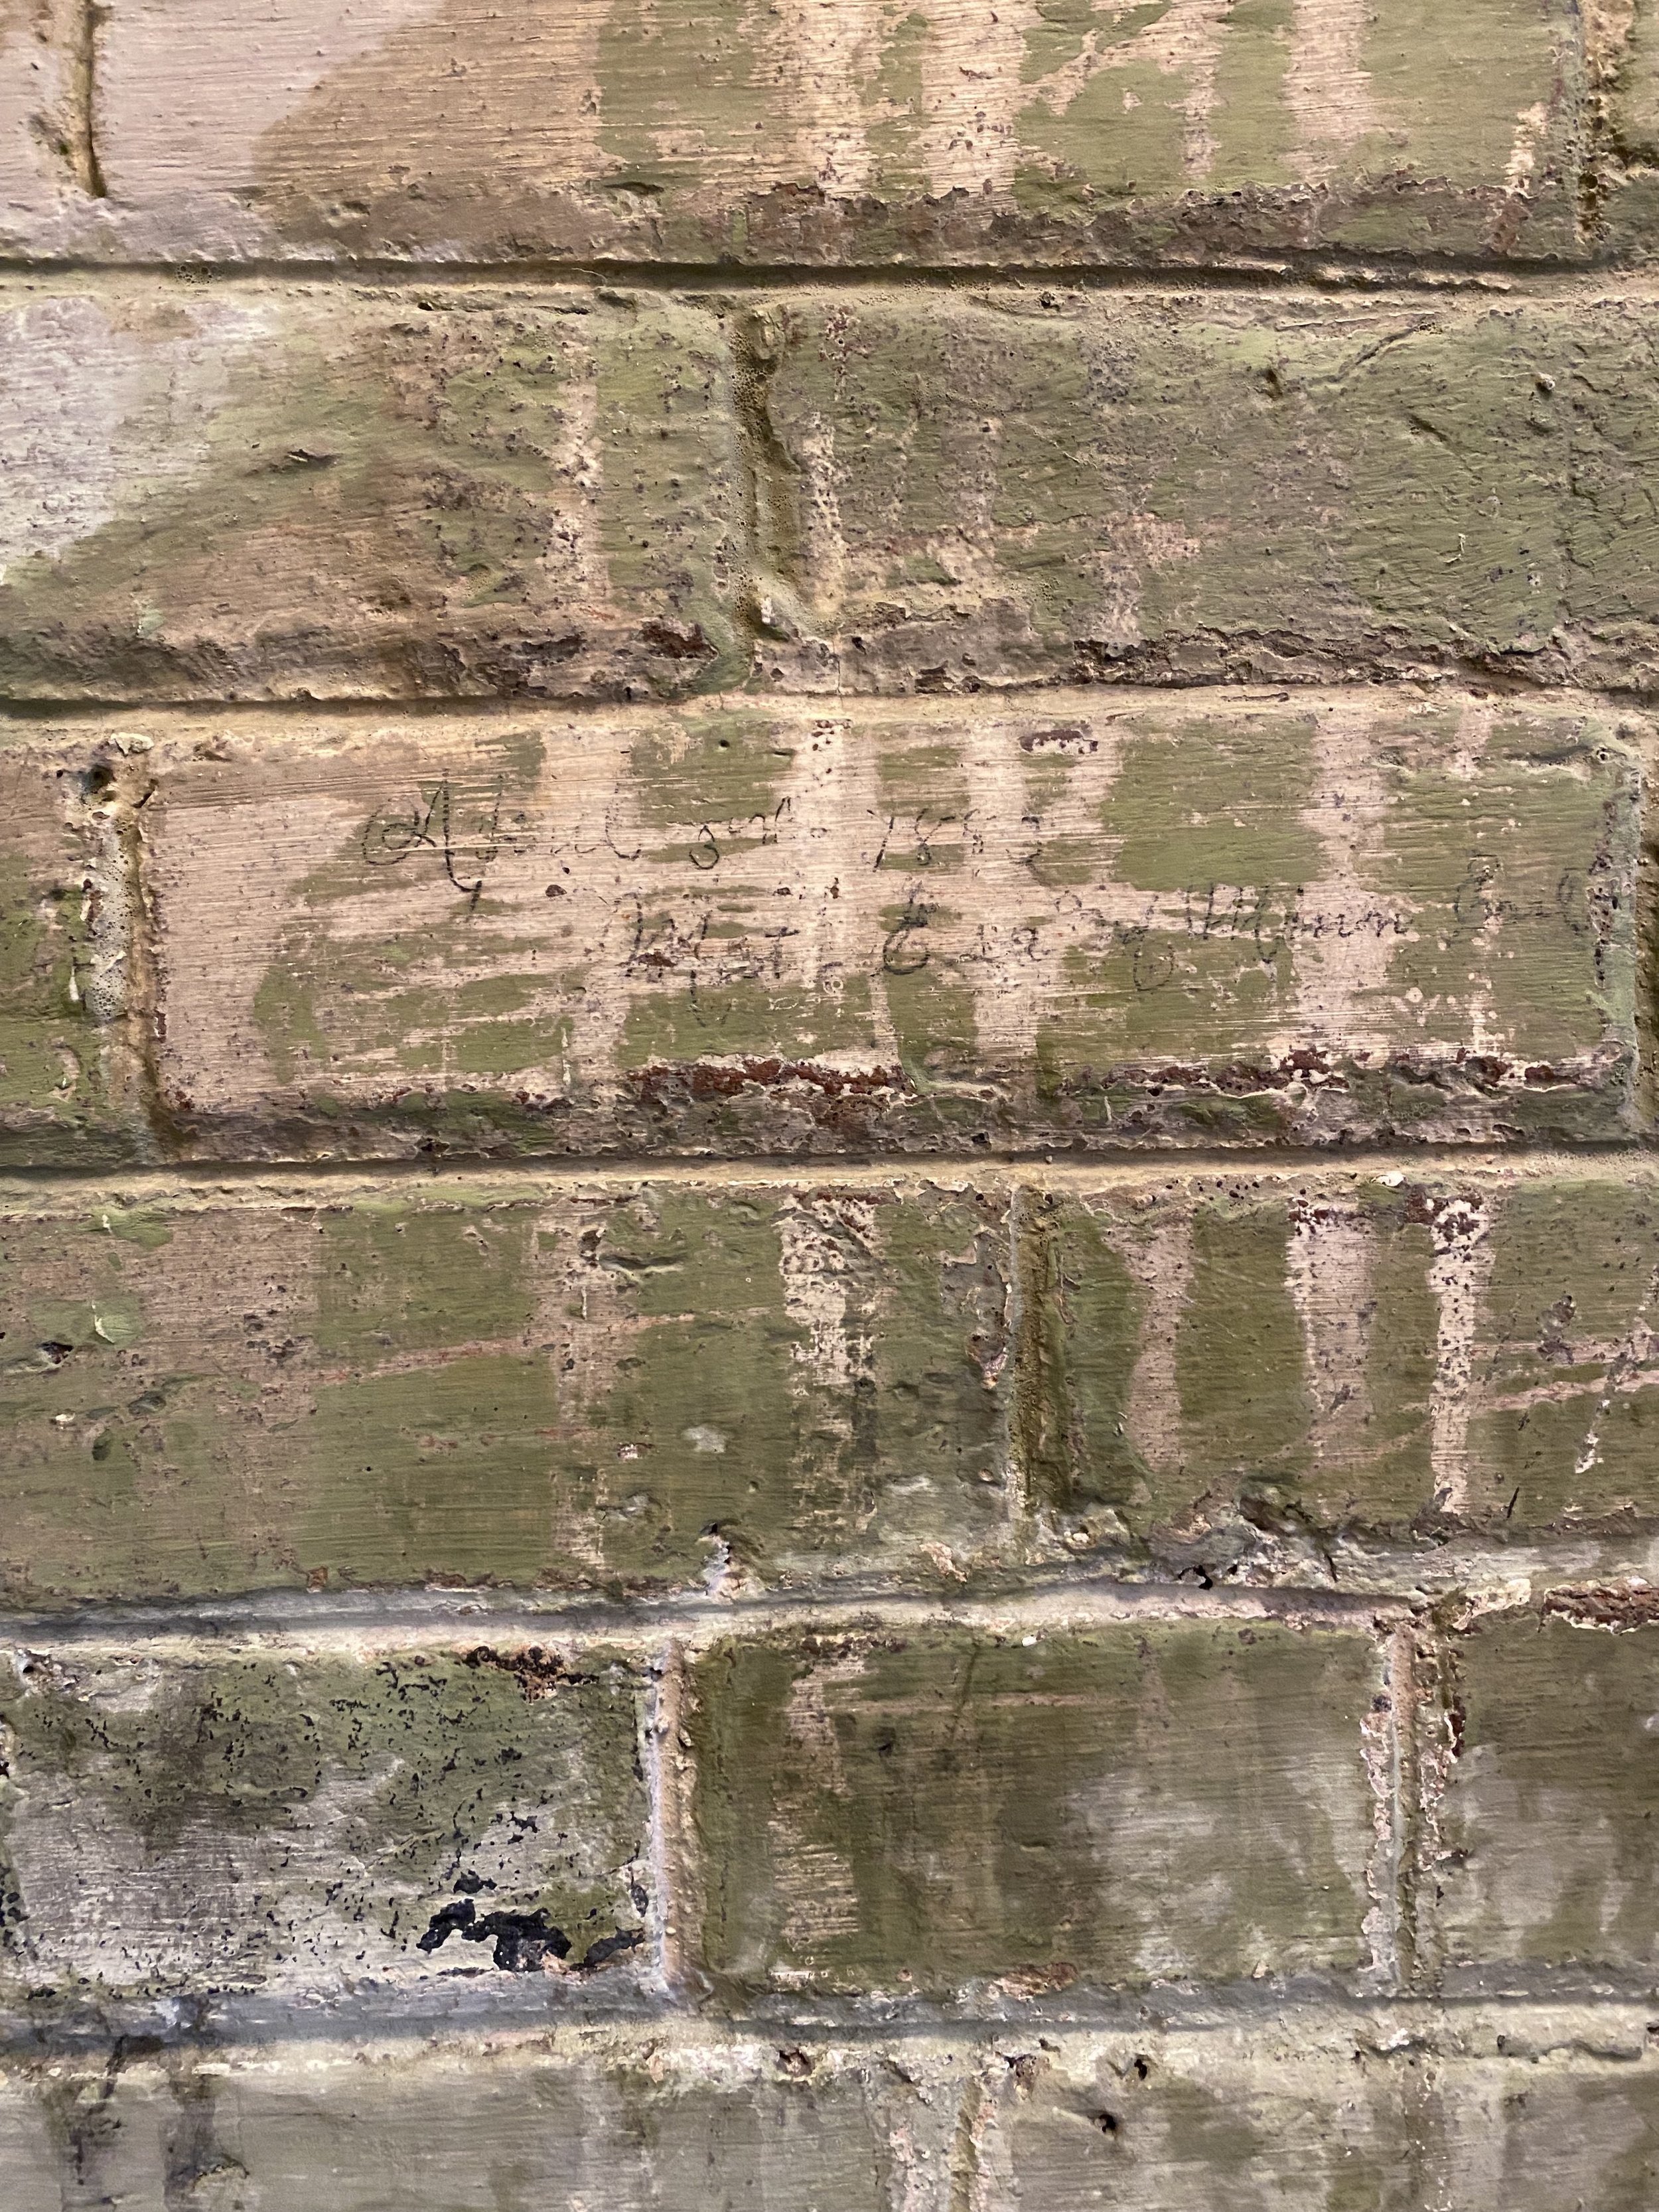
While we did uncover brick, it was covered in a strange green white-wash style covering. After many, many, many, many sessions of washing the walls off, we uncovered a surprise! You can see the moment we uncovered this gem on our Instagram page too!
‘April 3rd, 1883 | Mat, Elsa, Miriam, Earl’
I’ve been doing lots of historical research, but I still haven’t uncovered who these people are. Be sure once I do, I will report back.
Unfortunately, will a mixture of loose and broken bricks, and the poor state of the secure bricks, we opted to paint over this writing. The bricks were crumbling and decided to paint over them to deter them from crumbling even more after a mason came to fix the broken and missing pieces.
The Finishing Touches
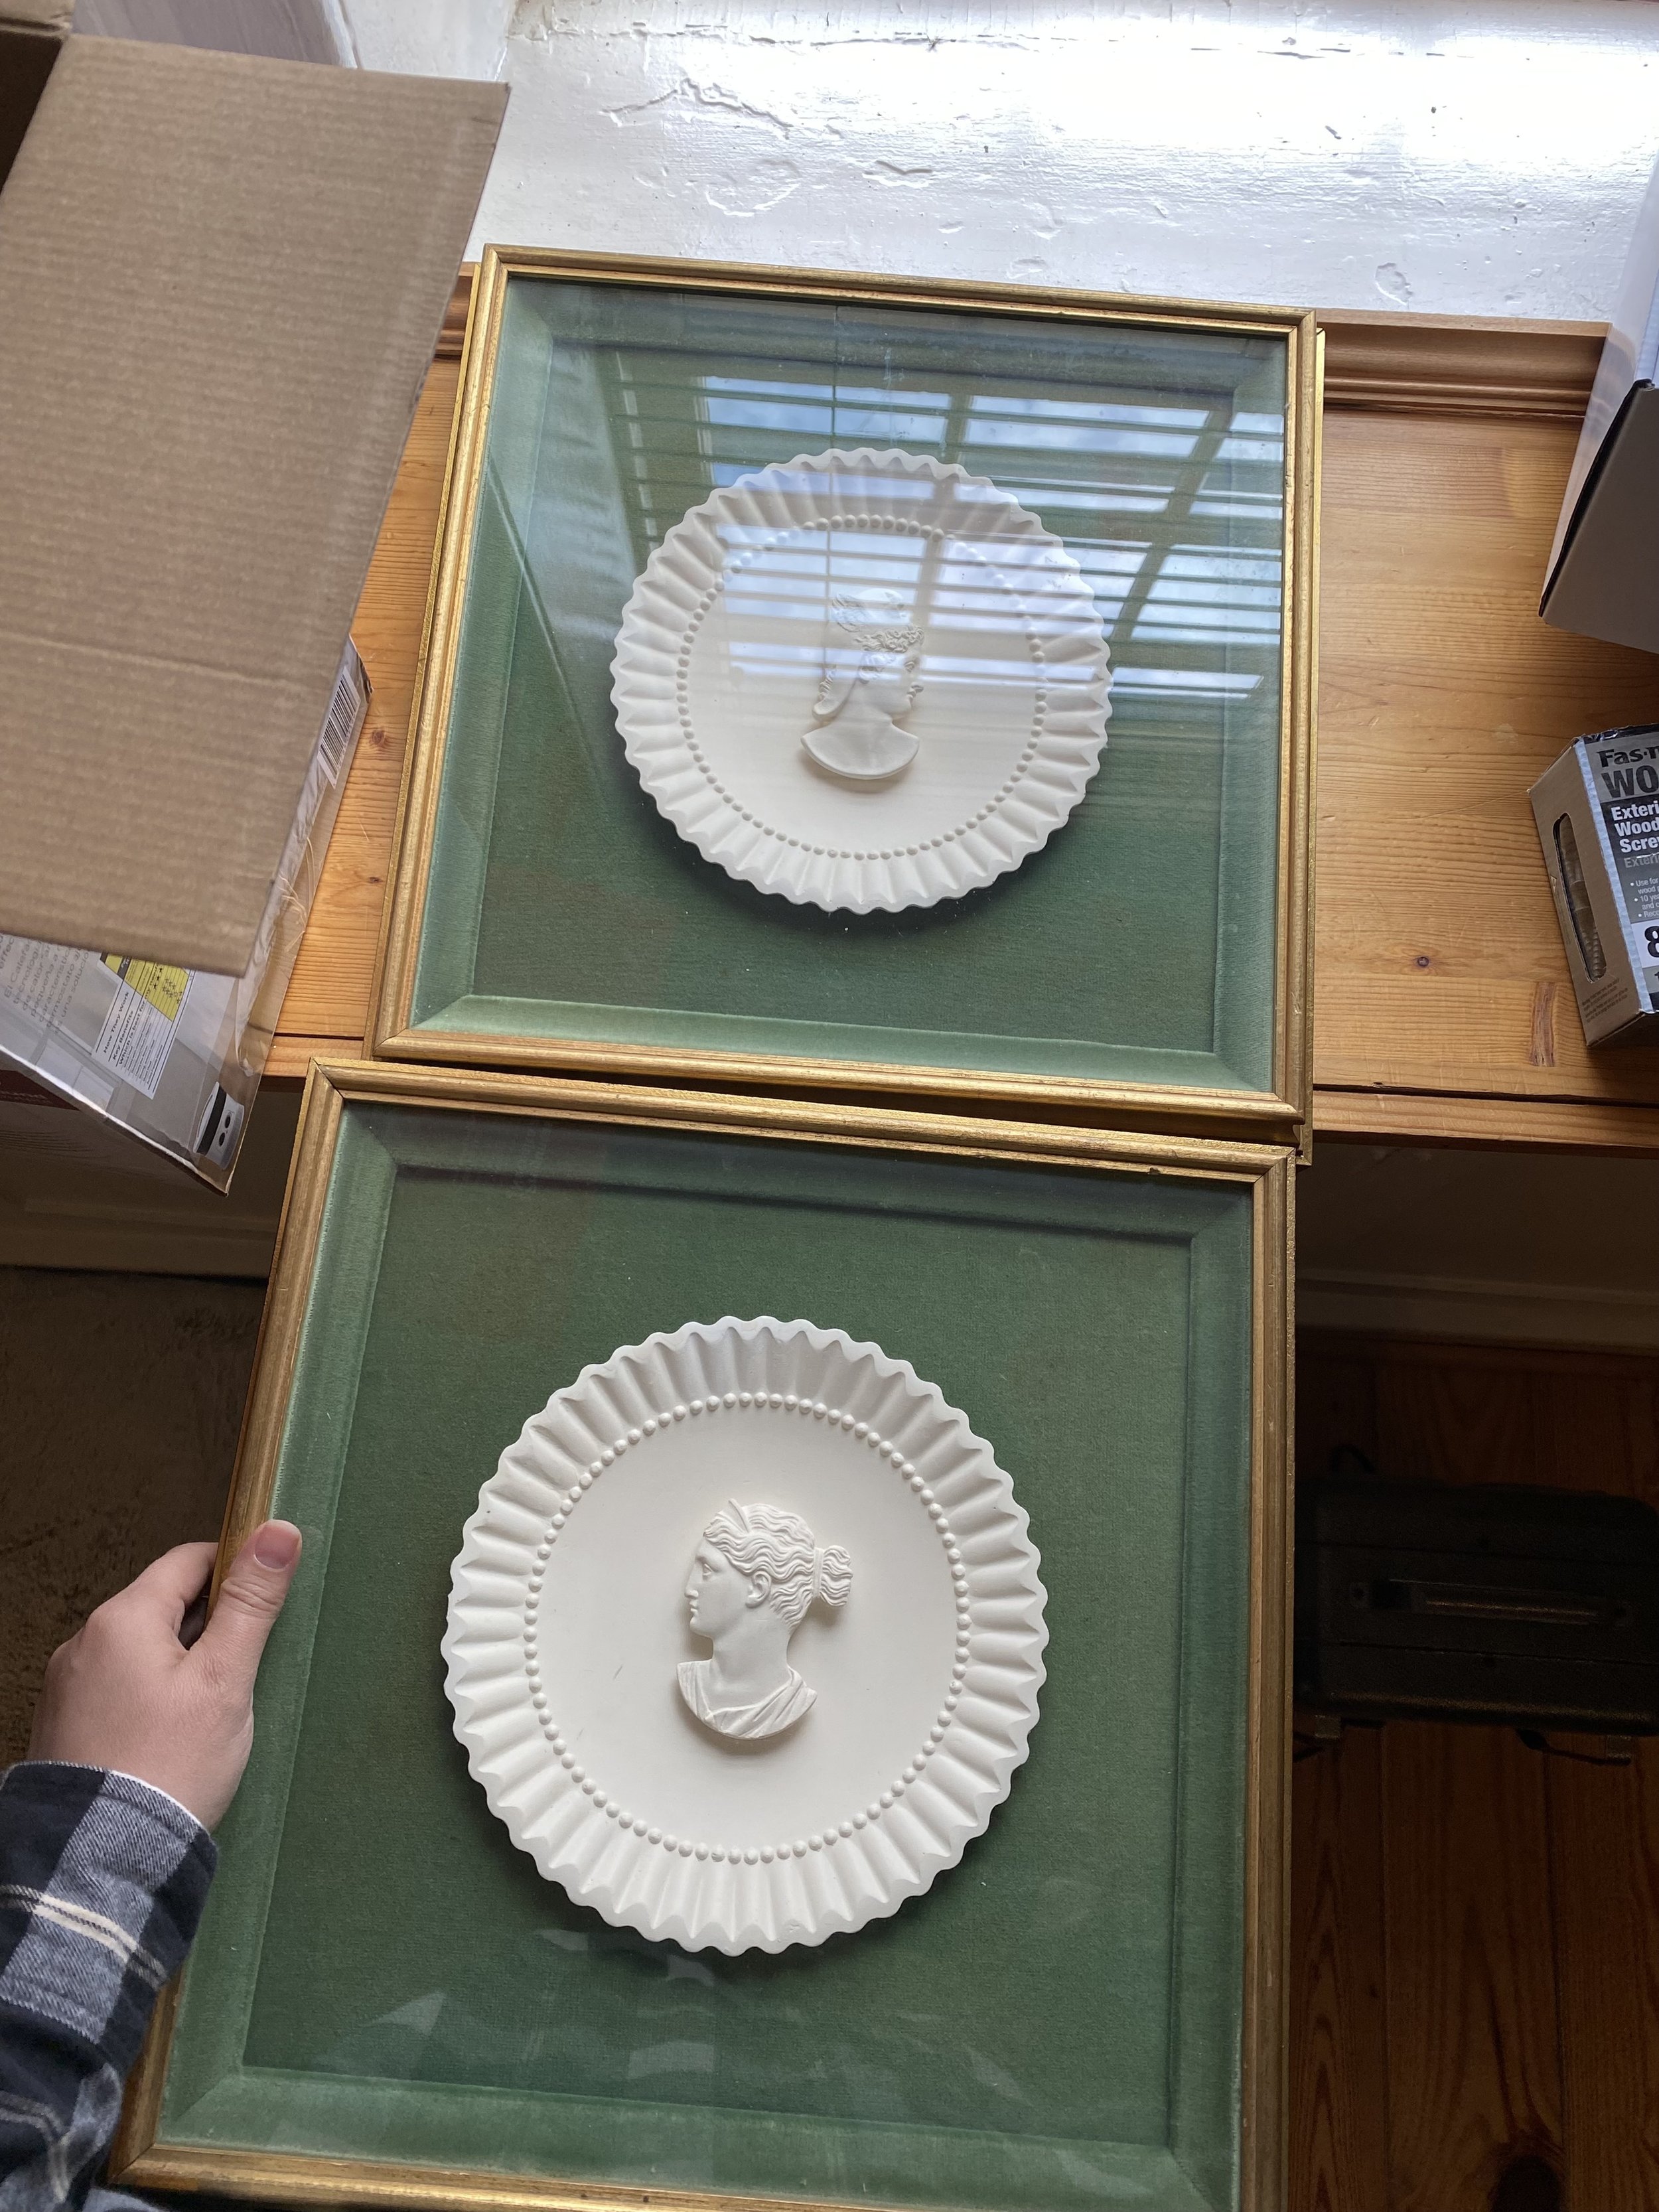
These thrifted art pieces were picked up when I first started the project and they became the visual centerpieces for the moodboard and inspo for this project. I was already leaning toward a green bathroom, but these pieces sealed the deal!
To pull in even more green, I opted for a green vanity and to tie in the gold frames, a reproduction of a vintage-style mirror was a no-brainer as was a gold toilet paper holder.
I added in texture with some storage baskets in the exposed shelving, a painting, and green ceramic jar, and a small glass vase with a sprig of flowers.
And that’s the whole bathroom! I’m completely obsessed with every square inch of this small space and giddy to share the private Suite 201 bathroom… soon!


